The following article outlines the minimum steps required to schedule Order Importer using the task scheduler built into windows. This example show a scheduled task being created on a Windows 7 installation but the general steps are common to most schedulers including Windows XP & Vista.
For instruction on how to create a scheduled task in Windows XP see: http://support.microsoft.com/kb/308569, you can refer to this page if your not sure.
Begin by opening the task scheduler user interface, you can do this by selecting it from within the Order Importer menu: Tools > Scheduling > Open Windows Task Scheduler
Alternatively you can open it from: Windows > Control Panel > Administrative Tools > Task Scheduler
Once the task scheduler is open you will see the following screen, If your using Windows XP don't worry that it looks different from the following screenshots as all the relevant options are still present and are similarly named, with this article it should be easy to identify the appropriate options to select.
Begin by selecting "Task Scheduler Library" from the left menu pane and a list of currently defined tasks will be displayed Fig 1 (XP opens direct to the task list)
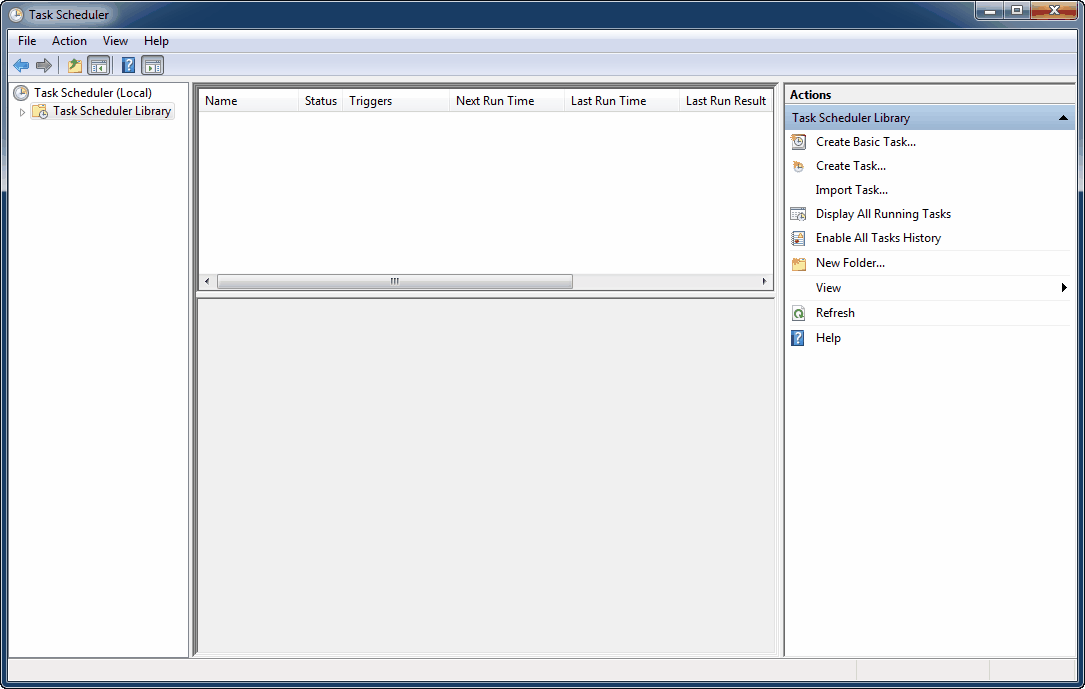
Fig 1
Click the "Create Task" option in the right pane and the following screen shown in Fig 2 will appear, give the task a descriptive name and select whether you want the task to run whether your logged in or not, typically you would want it to run when your not logged in, especially if you have it set-up on a server.
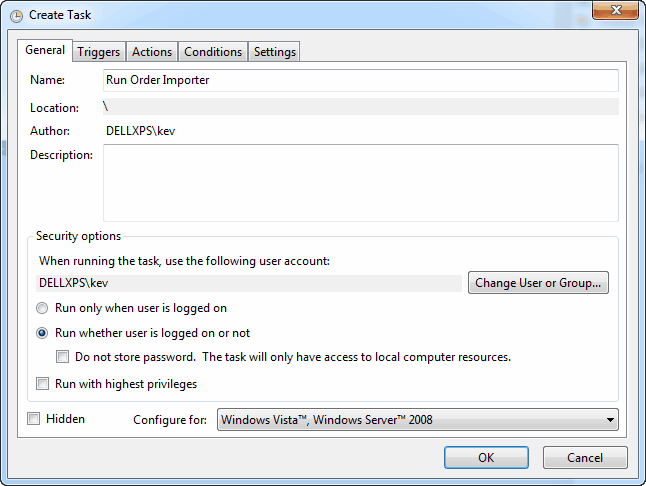
Fig 2
Next navigate to the "Triggers" tab and click the "New" button, the screen shown in Fig 3 will open. Here you can configure the actual schedule times you wish the application to run, the setting we configured in Fig 3 show the task will run at 00:00, recurs every day and repeats every hour during each day.
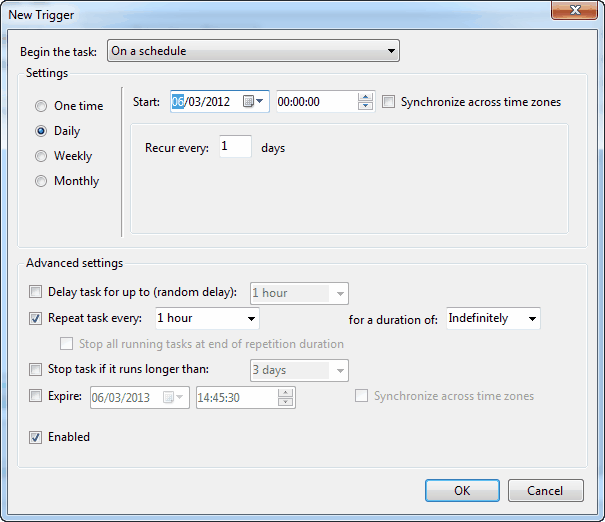
Fig 3
Once you have finished configuring your schedule times click the "OK" button and navigate to the "Actions" tab on the main "Create Task" screen, click the "New" button to create an Action for the task and the "New Action" screen shown in Fig 4 will appear.
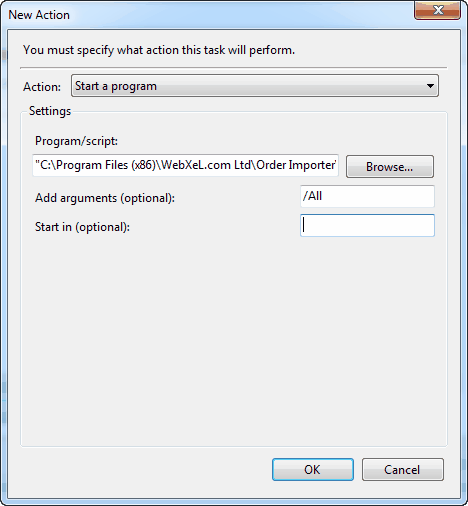
Fig 4
Leave the action set to "Start a program" and click the browse button to select the Orderimporter.exe executable, typically this is installed in the WebXel.com Ltd\Order Importer directory found in the program files directory but as its possible to change this during installation yours may be installed in another location.
For the Add Arguments value type "/All" in to the box then click "OK", this will make the task run an import for all defined, to run only specific job(s) see defining which jobs to run.
That's the scheduled task defined, now click the "OK" button on the "Create Task" screen, depending on which user/group you have defined the task to run under and whether you opted to have the task run when the user is logged in or not you my be prompted for the users Windows login credentials with the screen shown on Fig 5, if so fill in the appropriate details and click "OK"
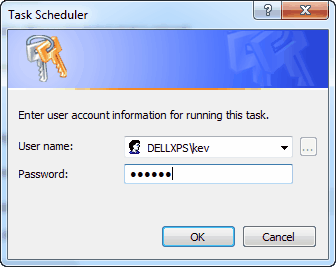
Fig 5
Now you should see the new task listed in the main scheduled tasks list as in Fig 6, you car test it works properly using the run option, please be aware if you currently have Order Importer open running the task will fail as you can only have one instance of the application running at a time. Also please note when running from a schedule task Order Importer will not display any user interface, nor will it display any errors that may occur, to check for error see task errors.
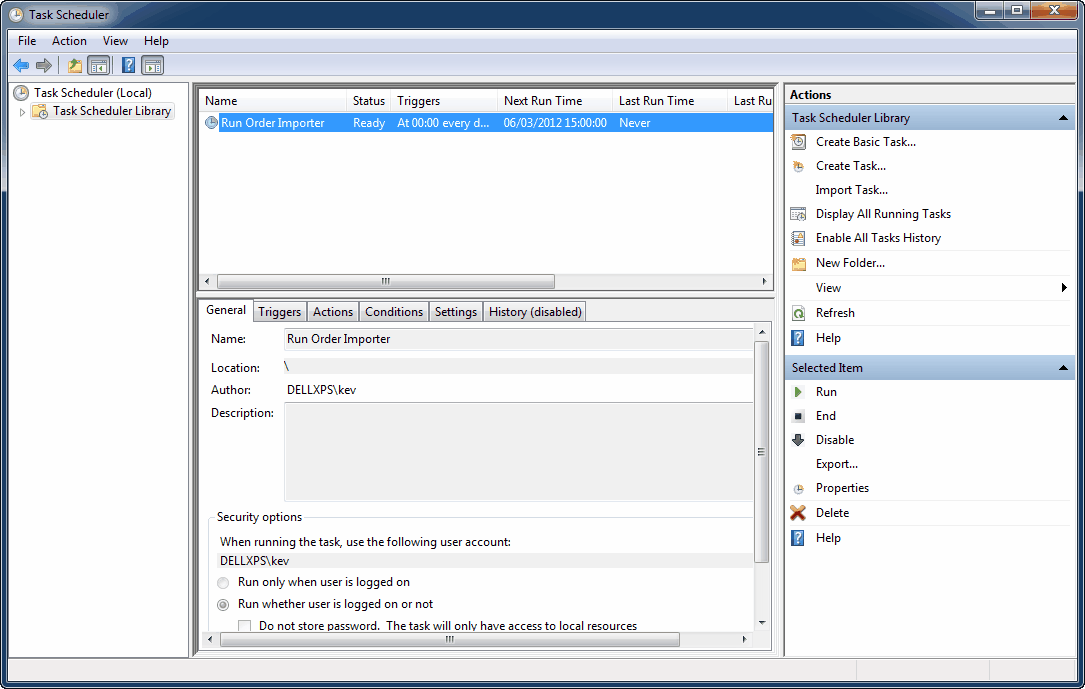
Fig 6