When importing files using a defined job there are no additional rules only the rules outlined here apply.
The files imported using a defined job can include column names in the first row but they don't have to, you can specify whether this is the case when setting up the job. it is recommended that the files do include column names though as each time a file is imported the field mapping you specify is saved to be re-used in future imports.
Warning:
If the file does not contain column names and the order of the columns within the file changes between imports there is a possibility you may not notice this has happened and end up saving a columns data into the wrong sage field, so its important to ensure the column order within the file does not change between imports or even better include column names in the first row of the file so it won't matter which order they are defined within the file.
Importing a file
Importing a file begins in the main interface
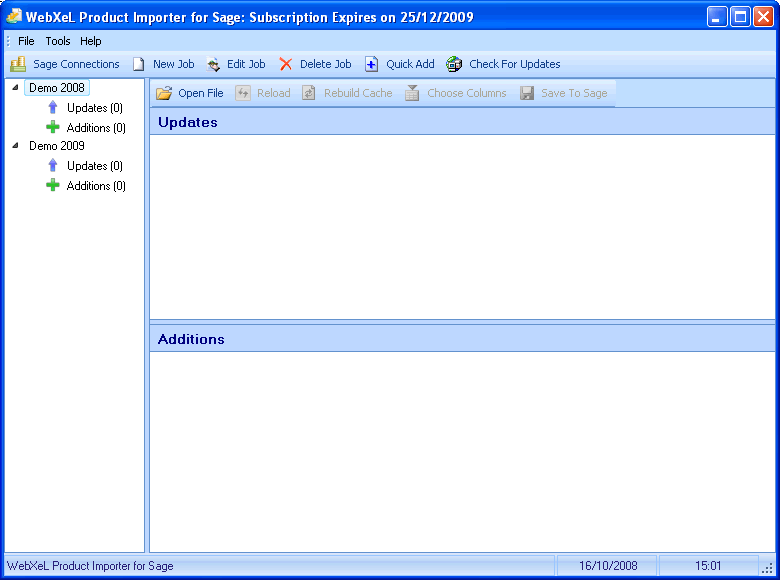
Select a job and then click the "Open File" button, you will be prompted to select a file from your file system. after selecting the file it will be opened in the Preview form.
Preview Form
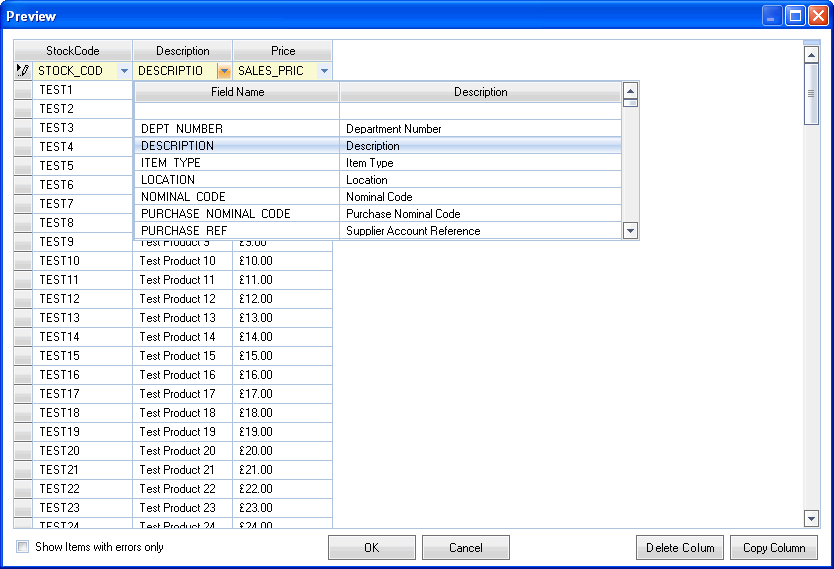
The preview form shows the file contents in a grid, with a field mapping row at the top, use the embedded drop down list within the mapping row to map columns in your file to the desired sage field. once you are finished mapping the fields click the "OK" button to transfer the data to the main interface, at this point the data will be validated and any problems will be reported by highlighting the column header and any invalid cells in red, hold mouse pointer over an invalid cell to see a popup explanation of the error.
You can delete a column by selecting the column header and clicking the Delete Column button, you can also copy a column in the same manner clicking the Copy Column button. an example of where copying a column may be useful is if you want to map a column to more than one sage field, copy the column then map the new column to any sage field you like. the only limitation is copied columns will not persist between file imports, if you need a persistent method of mapping an import column to multiple sage fields define a custom default value that utilizes an expression.
If your data won't validate because of data errors you can check the "Show items with errors only", this saves you having to scroll large amounts of data looking highlighted items. multiple items can be selected using the standard Shift/Ctrl combinations.
If required rows can be removed from the grid by selecting the row using the record selectors on the left side of the grid and pressing the "delete/del" key.
If your data passes validation it will be transferred to the main interface where sage will be checked against the import data to show which products are new thus require adding to sage and which products require updating.
Once back in the main interface it will now be populated with your imported data as shown in the screenshot below, if there are any updates required they will be shown in the updates list and the fields that will be updated are highlighted in blue. if any of your imported products do not appear in any of the lists it means the product already exists in sage and all its fields already match your imported data.
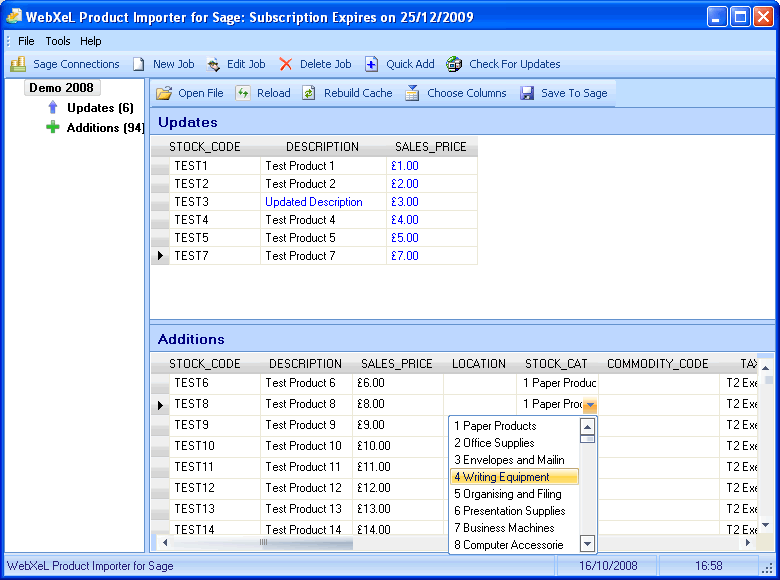
If there is a field you want applied to new products but not updates or the other way round you can click the Choose Columns button, this lets you select which column in each grid you want visible, if a column is not visible its data will not be applied to sage.
If your happy with the proposed actions click the "Save To Sage" button to save the data to sage.