When you first start the application you will see the screen below with the demo job selected, this job is pre-defined to integrate with the Sage Line 50 demo data. It is also pre-configured to connect to our test server and download demo data. This allows you to see the software working straight away.
To get started: ensure your connected to the internet and then click "Download Orders" on the tool bar, the application download the demo orders, once the download is complete you can click the "New" item in the Jobs pane to see a list of downloaded orders.
To save downloaded orders to Sage simply click "Save To Sage" on the tool bar and wait a few seconds, that's it! 100 orders and associated customer data transferred downloaded from the internet and saved to Sage in only a couple of minutes.
You can repeat this as often as you like because we have configured our test server not to mark these orders as downloaded, this means the application will be able to download them multiple times, however in a real situation your remote server will mark orders as downloaded avoiding the application downloading them again, only new orders would be downloaded.
Main User Interface
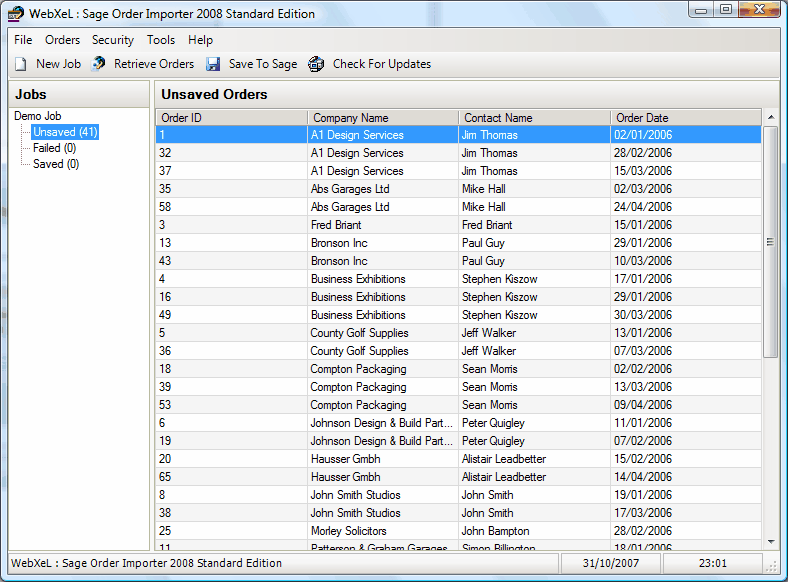
The main user interface can be broken down as follows:
Left Window
The left window is where all the defined jobs are displayed, each job is displayed as a main entry which is the name of the job, and this entry contained three sub entries consisting of New, Failed and Saved.
•Unsaved
This contains any new orders that have not yet been saved to Sage.
•Failed
This contains any orders that failed to save to Sage for some reason; to find out why an item failed you can view the error description by clicking "Error Details" in the right hand window when the failed entry is selected in the left hand window.
•Saved
This contains orders that have been successfully saved to Sage during the current session, to see older saved orders you can use the history report viewer.
A total count of orders in each section is also shown in the left window.
Right Window
The right window changes its content based on the selections made in the left window it will show unsaved, failed or saved orders based on the selected item in the left window.
Menus & Toolbar
File Menu
•New Job
Create a new job then opens the job wizard for you to configure the job
•Edit Job
Opens the selected in the job wizard for you to configure the job
•Import Job
Imports a previously exported job
•Delete Job
Selecting this deletes the selected job.
•Exit
Selecting this causes the application to exit.
Orders Menu
•Retrieve Orders
Selecting this causes the application to connect and retrieve new orders for all jobs.
•Save To Sage
Selecting this causes the application to post any new orders to Sage.
•Import > Xml
Selecting this will import orders from XML files.
•Import > CSV
Selecting this will import orders from CSV files.
•Import > Excel
Selecting this will import orders from Excel spreadsheets.
•Edit Order
Selecting this will open the order editor enabling editing of the order you have selected in the Unsaved or Failed order lists.
•Delete Order
Selecting this will delete the order you have selected in the Unsaved or Failed order lists.
•Change Customer ID
This allows you to change the CustomerID value of the customer associated with the selected order.
•Change Order ID
This allows you to change the OrderID value of the selected order.
Security Menu
•Configure
Selecting this allows you to define security for to restrict the application interface from unauthorized use.
see How To's > Configure Security
Tools Menu
• Scheduler
This will let you define a schedule for automatically fetching new orders for all defined jobs.
• History > Reports
This will open the report viewer that is used to view the history of orders posted to Sage.
• History > Erase All
This will delete all history items.
• Backup/Restore > Backup
This can be used to backup the application database.
• Backup/Restore > Restore
This can be used to restore the application database from a previous backup.
• Preferences
This opens the preferences screen; here you can edit the countries list and notification options.
• Edit Sage Fields
This lets you edit the sage field information used by the application for custom fields and customer match fields.
Help Menu
• Contents
This option will open this help file.
• Sample Files
Give access to the sample import files in various formats.
• Website
Give access to the products web site.
• About
This will display the about dialog screen.
• Deactivate
Use this to deactivate the software in preparation for installing on a different computer.